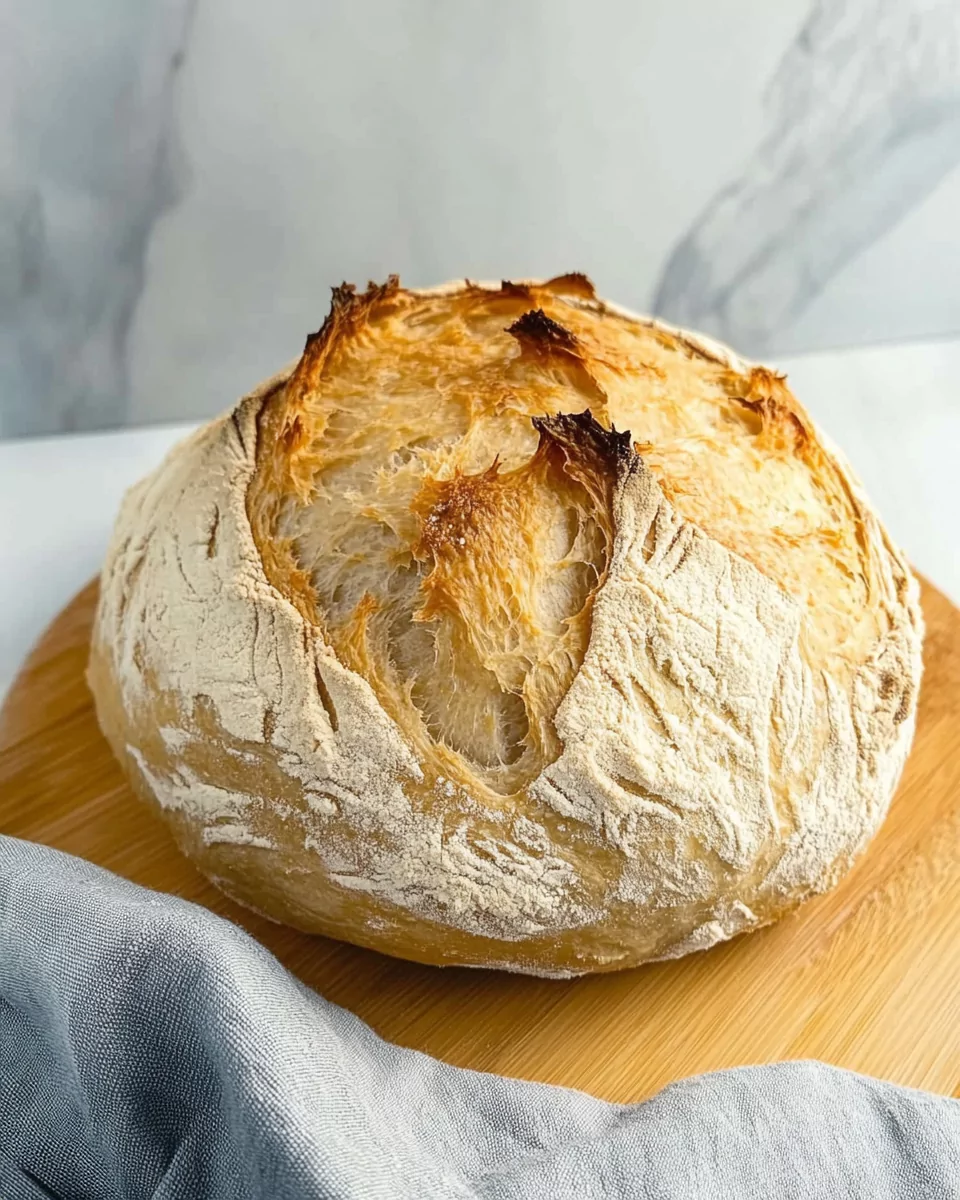
This Quick and Easy No-Knead Bread is a game-changer for both seasoned bakers and beginners. With its no-knead simplicity, this recipe delivers a crusty, chewy loaf reminiscent of artisan bakery bread. Here’s why you’ll love it:
Grab This Chef Knife Now - Almost Gone!
- Stays Razor-Sharp: Ice-hardened blade keeps its edge longer than ordinary knives
- Superior Grip Control: Unique finger hole design gives you perfect balance and safety
- Built to Last a Lifetime: Premium stainless steel blade with elegant beech wood handle
Customer Reviews ★★★★★
- Effortless Preparation: No kneading or fancy techniques required.
- Minimal Ingredients: Made with just 3 pantry staples.
- Perfect Texture: Crusty on the outside, soft and chewy inside.
- Time-Saving: Ready in under 3 hours, including rising time!
Whether you’re short on time or want to impress with minimal effort, this bread is your go-to recipe.
Preparation Phase and Tools to Use
Before diving in, gather your essentials:
Why These Tools Are Essential:
- The mixing bowl ensures you have ample space for the dough to rise.
- A Dutch oven locks in moisture, creating a bakery-style crust.
- Parchment paper simplifies transferring and prevents sticking.
Preparation Tips for Success
- Choose the Right Flour: Bread flour yields the best structure and chewiness.
- Warm Water Temperature: Keep the water between 100–110°F (37–43°C) for activating the yeast.
- Draft-Free Rising Spot: Use a turned-off oven or a warm corner of your kitchen to help the dough rise.
Ingredients
- 3 cups bread flour
- 1 packet (2 teaspoons) rapid rise yeast
- 1 ½ teaspoons salt
- 1 ½ cups warm water
Pro Tip: You can experiment with mix-ins like chopped herbs, shredded cheese, or seeds for a personalized touch.
Step-by-Step Directions
1. Mix the Dough
- In a large mixing bowl, combine the bread flour, rapid rise yeast, and salt.
- Gradually pour in warm water while mixing with a wooden spoon or spatula.
- Stir until a sticky dough forms. (It’s okay if it looks messy—don’t worry!)
2. Let the Dough Rise
- Cover the bowl with a damp cloth or plastic wrap.
- Place the bowl in a draft-free area and let the dough rest for 2–3 hours, or until it doubles in size.
3. Preheat the Oven
- When the dough is almost done rising, preheat your oven to 450°F (232°C).
- Place your Dutch oven (with the lid on) inside the oven to heat while preheating.
4. Shape the Dough
- Lightly sprinkle flour on a clean countertop.
- Turn the dough out onto the floured surface and fold the sides inward about 6 times to form a round loaf.
- If the dough sticks to your hands, dust them lightly with flour.
5. Transfer to Parchment Paper
- Place the shaped dough onto a piece of parchment paper.
- Leave enough paper hanging over the sides for easy lifting later.
6. Bake the Bread
- Carefully remove the Dutch oven from the oven (it will be extremely hot!).
- Using the parchment paper, transfer the dough into the Dutch oven.
- Cover with the lid and bake for 30 minutes.
- After 30 minutes, remove the lid and bake for another 15 minutes, or until the bread is golden brown.
7. Cool and Serve
- Use the parchment paper to lift the bread out of the Dutch oven.
- Let the bread cool on a wire rack for at least 15 minutes before slicing.
Pro Tip: Resist the urge to slice the bread immediately—it needs time to set for the perfect texture.
Serving Suggestions
The beauty of this Quick and Easy No-Knead Bread lies in its versatility. Here are some delightful ways to serve it:
- Classic Pairing: Slice and serve with butter or olive oil for dipping.
- Breakfast Favorite: Top with avocado, poached eggs, or jam.
- Hearty Meal: Pair with soups, stews, or chili for a comforting combo.
- Cheese Board Staple: Use as a base for charcuterie platters or alongside soft cheeses.
- Sandwich Base: Slice thick for gourmet sandwiches like Caprese or BLT.
- Garlic Bread: Toast with garlic butter and herbs for a side dish upgrade.
- Dessert Option: Spread with Nutella or honey for a sweet twist.
Common Mistakes to Avoid & How to Perfect the Recipe
Even the simplest recipes can go awry. Avoid these common pitfalls for bakery-perfect bread every time:
- Not Letting the Dough Rise Fully:
- The dough must double in size during rising for the best texture.
- Use a warm, draft-free spot to help the yeast activate properly.
- Using Water That’s Too Hot or Too Cold:
- Water over 120°F can kill the yeast, while cooler water may not activate it. Stick to 100–110°F.
- Skipping the Preheated Dutch Oven:
- Preheating the Dutch oven ensures the bread gets its signature crust.
- Over-Handling the Dough:
- Handle the dough gently when shaping to retain air pockets, which create a light, chewy interior.
- Slicing Too Soon:
- Let the bread cool for at least 15 minutes before slicing to avoid a gummy texture.
Side Dish Recommendations
Elevate your meal by pairing this bread with these delicious side dishes:
- Creamy Tomato Soup
- The tangy richness complements the bread’s crusty exterior.
- Beef Stew
- Perfect for soaking up the hearty, savory broth.
- Roasted Garlic Butter
- Spread on warm slices for an irresistible flavor boost.
- Fresh Garden Salad
- A light and refreshing pairing to balance the bread’s chewiness.
- Bruschetta Topping
- Use the bread as a base for diced tomatoes, basil, and balsamic glaze.
- Cheesy Spinach Dip
- Tear the bread into chunks for dipping into this creamy appetizer.
- Herbed Olive Oil Dip
- Mix olive oil with rosemary, garlic, and balsamic vinegar for an elegant option.
- Pasta Dishes
- Serve alongside spaghetti, lasagna, or fettuccine Alfredo for a complete meal.
Recipe Tips for Success
- Experiment with Flour: While bread flour yields the best results, you can substitute all-purpose flour in a pinch.
- Add Flavor Variations: Mix in seeds, herbs, or even grated cheese for a unique twist.
- Timing Flexibility: If you’re short on time, use rapid rise yeast to speed up the process without compromising the quality.
- Handle Dough Gently: Avoid overworking the dough during shaping to preserve its airiness.
Storage and Reheating Instructions
Storing Your Bread:
- Allow the bread to cool completely before storing to avoid trapping moisture.
- Wrap it in a clean kitchen towel and place it in a bread box to maintain its crusty exterior for 1–2 days.
- For longer storage, slice the bread and freeze it in an airtight bag for up to 3 months.
Reheating Your Bread:
- To revive the crust, reheat the bread in a 350°F (175°C) oven for 10–15 minutes.
- For slices, use a toaster or skillet to warm them up quickly.
Frequently Asked Questions (FAQs)
- Can I make this bread without a Dutch oven?
- Yes, you can use an oven-safe pot with a lid or even bake on a baking sheet. Cover the bread with foil for the first 30 minutes to simulate the steam effect.
- What if I don’t have rapid rise yeast?
- Regular active dry yeast works too. Activate it in warm water with a pinch of sugar for 5 minutes before adding it to the dry ingredients.
- Can I let the dough rise overnight?
- Absolutely! Place the covered dough in the refrigerator for 8–12 hours to develop deeper flavors.
- Why is my dough too sticky to handle?
- A sticky dough is normal for no-knead recipes. Lightly flour your hands and workspace to make it manageable.
- How can I get an even crispier crust?
- Bake the bread for an additional 5 minutes after removing the lid, or use a spray bottle to mist the dough with water before baking.
- What can I do if my bread doesn’t rise?
- Ensure your yeast is fresh and your water temperature is correct. Rising in a warm, draft-free spot helps too.
- Can I double the recipe?
- Yes, but ensure you use a larger Dutch oven or bake two loaves separately for consistent results.
- Is this bread suitable for sandwiches?
- Definitely! Slice it thick for hearty sandwiches or thin for delicate ones.
Conclusion
Making Quick and Easy No-Knead Bread at home is a delightful way to enjoy fresh, bakery-quality bread with minimal effort. With its simple ingredients and no-fuss preparation, this recipe is perfect for beginners and seasoned bakers alike. Serve it with your favorite meals, customize it with creative variations, and savor the satisfaction of homemade goodness.
If you loved this recipe, explore our collection of bread recipes and easy meal ideas. Share your results and tips in the comments below!
Quick and Easy No-Knead Bread
Ingredients
- 3 cups bread flour
- 1 packet 2 teaspoons rapid rise yeast
- 1 ½ teaspoons salt
- 1 ½ cups warm water
Instructions
Mix the Dough:
- In a large mixing bowl, combine the flour, rapid rise yeast, and salt.
- Add the warm water and mix with a wooden spoon or spatula until a sticky dough forms. This is normal—don’t worry if it looks messy!
Let the Dough Rise:
- Cover the bowl with a damp cloth and let the dough rest in a draft-free place (like a turned-off oven) for 2-3 hours, or until it doubles in volume.
Preheat the Oven:
- A few minutes before the rising time is complete, preheat your oven to 450°F (232°C). Place a Dutch oven (with the lid on) in the oven to heat while it preheats.
Shape the Dough:
- Lightly sprinkle flour on your countertop and turn the dough out onto it.
- Gently fold the sides of the dough inward about 6 times to form a round loaf. If the dough sticks to your hands, dust them lightly with flour.
Transfer to Parchment Paper:
- Use a dough scraper or large knife to transfer the dough onto a piece of parchment paper. Leave enough parchment paper hanging over the sides to help lift the bread later.
Bake the Bread:
- Carefully remove the Dutch oven from the oven (it will be very hot!).
- Bake for 30 minutes with the lid on.
- After 30 minutes, remove the lid and bake for an additional 15 minutes, or until the bread is golden brown.
Cool and Serve:
- Remove the bread from the Dutch oven using the parchment paper and let it cool on a wire rack before slicing.
Notes
Be cautious when handling the Dutch oven, as it will be extremely hot.


Leave a Comment