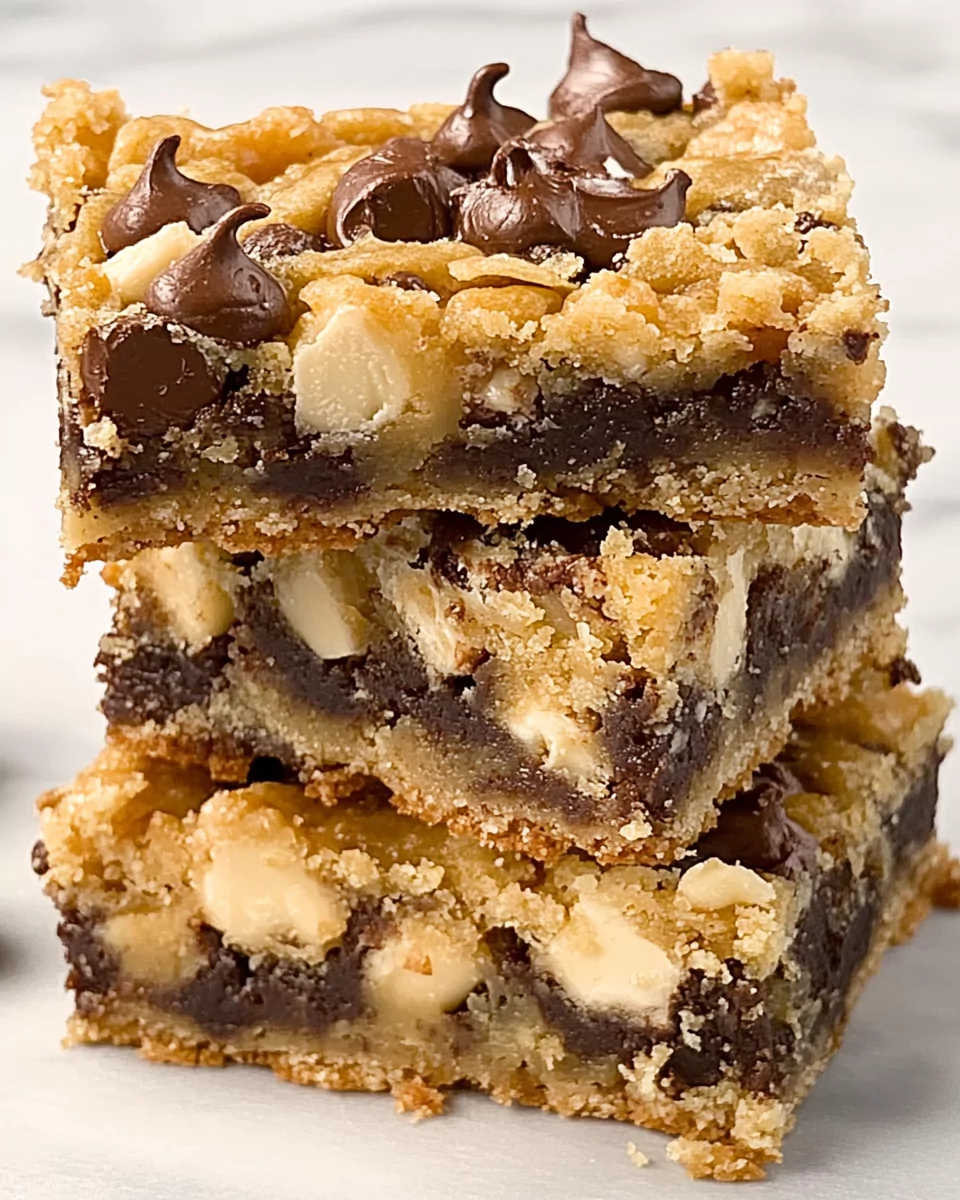
Magic Bars—also called 7-Layer Bars—are a beloved dessert for good reason. They’re rich, chewy, and packed with layers of flavor that combine to create an unforgettable bite. With buttery graham cracker crust, indulgent chocolate, sweet butterscotch, coconut, and crunchy nuts, all tied together with luscious condensed milk, these bars are perfect for any occasion.
Grab This Chef Knife Now - Almost Gone!
- Stays Razor-Sharp: Ice-hardened blade keeps its edge longer than ordinary knives
- Superior Grip Control: Unique finger hole design gives you perfect balance and safety
- Built to Last a Lifetime: Premium stainless steel blade with elegant beech wood handle
Customer Reviews ★★★★★
Why You’ll Love These Magic Bars
- Quick and Easy: Prep takes just 10 minutes.
- Versatile: Easily customizable to fit your taste or dietary needs.
- Perfect for Gatherings: A crowd-pleaser that’s easy to transport.
Preparation Phase & Tools to Use
Essential Tools and Equipment
- 9×13″ Baking Pan: Ensures even cooking and ample space for layering.
- Mixing Bowl: For combining crust ingredients.
- Parchment Paper: Prevents sticking and makes cleanup easy.
- Measuring Cups and Spoons: For precise ingredient measurements.
- Microwave or Bowl of Hot Water: To warm condensed milk if needed.
Preparation Tips
- Use parchment paper with overhanging edges to lift the bars easily after baking.
- Ensure your butter is fully melted or softened for smooth crust formation.
- Warm the condensed milk slightly for easy pouring—either microwave it briefly or place the unopened can in a bowl of hot water.
Ingredients
Here’s what you’ll need to create these classic 7-layer bars:
- 1 ½ cups graham cracker crumbs (approximately 1 sleeve or 9 full sheets)
- ½ cup unsalted butter, melted or softened
- 1 cup semi-sweet chocolate chips
- 1 cup butterscotch chips
- 1 cup sweetened shredded coconut
- ½ cup pecans or walnuts, roughly chopped
- 1 14-ounce can sweetened condensed milk
Step-by-Step Directions
1. Preheat and Prepare
- Preheat your oven to 350°F (180°C).
- Line a 7×11″ or 9×13″ baking pan with parchment paper, leaving some overhang for easy lifting later.
2. Create the Crust
- In a mixing bowl, combine the graham cracker crumbs with melted butter.
- Press the mixture firmly and evenly into the prepared pan to form the base layer.
3. Add the Layers
- Sprinkle the chocolate chips evenly over the crust.
- Follow with a layer of butterscotch chips.
- Add the shredded coconut in an even layer.
- Top with chopped nuts, spreading them evenly for texture.
4. Pour the Condensed Milk
- Gently pour the sweetened condensed milk over the entire pan, covering all the layers evenly.
5. Bake
- Bake in the preheated oven for 25-30 minutes, or until the top is lightly golden and the layers are set.
6. Cool and Cut
- Allow the bars to cool completely in the pan before handling.
- Use the parchment paper overhang to lift the bars out of the pan.
- Slice into 12 large squares or 24 smaller pieces, depending on your preference.
Notes
- For an extra-smooth pour, pre-warm the condensed milk as described in the preparation tips.
- To make slicing easier, chill the bars briefly in the refrigerator before cutting.
- Experiment with different nuts or add a sprinkle of sea salt flakes for a unique twist.
Serving Suggestions
Here’s how you can elevate your presentation and make these bars a hit at any occasion:
- Holiday Platters: Arrange Magic Bars alongside cookies and fudge for festive spreads.
- Dessert Buffet: Serve on a tiered tray for potlucks or parties.
- With Beverages: Pair with coffee, hot cocoa, or a chilled glass of milk for a comforting treat.
- As Gifts: Wrap individually in decorative cellophane bags for thoughtful homemade gifts.
- Warm and Gooey: Slightly heat individual bars in the microwave and serve with a scoop of vanilla ice cream.
Common Mistakes to Avoid
Avoid these pitfalls to ensure your Magic Bars turn out perfectly every time:
1. Overbaking
- Keep a close eye on the bars after 25 minutes to prevent the edges from overbrowning.
- The bars are done when the top is lightly golden and set.
2. Uneven Layers
- Spread each layer evenly across the pan to ensure balanced flavor in every bite.
- Use your hands or a spatula to press down the layers gently as you go.
3. Crumbly Crust
- Make sure the graham cracker and butter mixture is well-combined and firmly pressed into the pan.
- Avoid using too much butter, which can make the crust greasy.
4. Skipping Parchment Paper
- Don’t forget to line the pan! This ensures the bars don’t stick and makes removal a breeze.
Side Dish Recommendations
Magic Bars are rich and indulgent, making them perfect to pair with lighter or contrasting dishes. Here are eight pairing ideas:
1. Fresh Fruit Platter
- Brighten the dessert table with a mix of fresh berries, sliced melons, and grapes.
2. Vanilla Ice Cream
- A scoop of creamy vanilla ice cream complements the chewy texture and rich flavors of the bars.
3. Mint Tea
- The refreshing notes of mint tea balance the sweetness of the Magic Bars.
4. Espresso Shots
- Bold and bitter, espresso adds an elegant contrast to the sugary layers.
5. Berry Salad
- A tangy mix of strawberries, blueberries, and raspberries dressed with a light honey-lime glaze is a refreshing companion.
6. Homemade Whipped Cream
- Add a dollop of lightly sweetened whipped cream for a creamy contrast.
7. Salted Popcorn
- The savory crunch of popcorn offsets the sweetness of the bars, making it a playful snack combo.
8. Crispy Bacon Strips
- For a bold, salty-sweet experience, serve alongside crispy bacon strips—especially at brunch!
Recipe Tips
1. Customize Your Ingredients
- Swap semi-sweet chocolate chips for dark chocolate for a richer flavor.
- Replace butterscotch chips with white chocolate chips or peanut butter chips for variety.
- Use gluten-free graham crackers to make the recipe gluten-free.
2. Add a Finishing Touch
- Sprinkle flaky sea salt over the bars before baking for a sweet-savory twist.
- Drizzle melted chocolate over cooled bars for a decorative and decadent finish.
3. Experiment with Nuts
- Try almonds, hazelnuts, or macadamia nuts for unique textures and flavors.
- Toast the nuts before layering to enhance their flavor.
4. Chill for Easier Slicing
- Refrigerate the bars for 30 minutes before cutting to achieve cleaner edges.
- Use a sharp knife and wipe it clean between cuts for neat slices.
Storage and Reheating Instructions
1. Room Temperature
- Store Magic Bars in an airtight container at room temperature for up to 5 days.
2. Refrigeration
- Keep the bars in a sealed container in the fridge for up to 2 weeks. This helps maintain their texture and freshness.
3. Freezing
- Wrap each bar individually in plastic wrap and place them in a freezer-safe container or bag. Freeze for up to 3 months.
- To thaw, transfer to the refrigerator overnight or leave at room temperature for 1–2 hours.
4. Reheating
- Warm individual bars in the microwave for 10–15 seconds for a soft, gooey texture.
FAQs
1. Can I make these ahead of time?
Yes! Magic Bars are an excellent make-ahead dessert. Prepare them up to two days in advance, store them in an airtight container, and slice them just before serving.
2. How do I prevent the crust from crumbling?
Ensure the graham cracker and butter mixture is well-combined and press it firmly into the pan. A flat-bottomed glass can help create an even, compact crust.
3. Can I skip the nuts?
Absolutely. If you prefer nut-free bars, omit the nuts and add more chocolate or butterscotch chips to maintain the texture and balance.
4. What can I substitute for sweetened condensed milk?
You can use a homemade condensed milk alternative by simmering equal parts whole milk and sugar until thickened. However, the texture and flavor may vary slightly.
5. How can I make these dairy-free?
- Use dairy-free butter and graham crackers.
- Substitute sweetened condensed coconut milk for regular condensed milk.
- Choose dairy-free chocolate chips and butterscotch chips.
6. Can I make these vegan?
Yes, with a few adjustments:
- Use vegan graham crackers and butter.
- Replace sweetened condensed milk with a vegan version.
- Ensure all chips are dairy-free and omit or substitute nuts if needed.
7. Why are my bars sticky after cooling?
Sticky bars can result from over-pouring condensed milk or underbaking. Use the recommended amount of condensed milk and ensure the bars are fully set before removing them from the oven.
Conclusion
Magic Bars are more than just a dessert—they’re a nostalgic favorite that blends simplicity with rich flavors. From customizing the ingredients to storing leftovers for future indulgence, these tips ensure every batch turns out perfectly. Whether for holidays, potlucks, or a casual treat, this recipe is bound to become a cherished staple in your kitchen.
Enjoy every layer of these delectable bars, and don’t forget to share them with friends and family for guaranteed smiles!


Leave a Comment