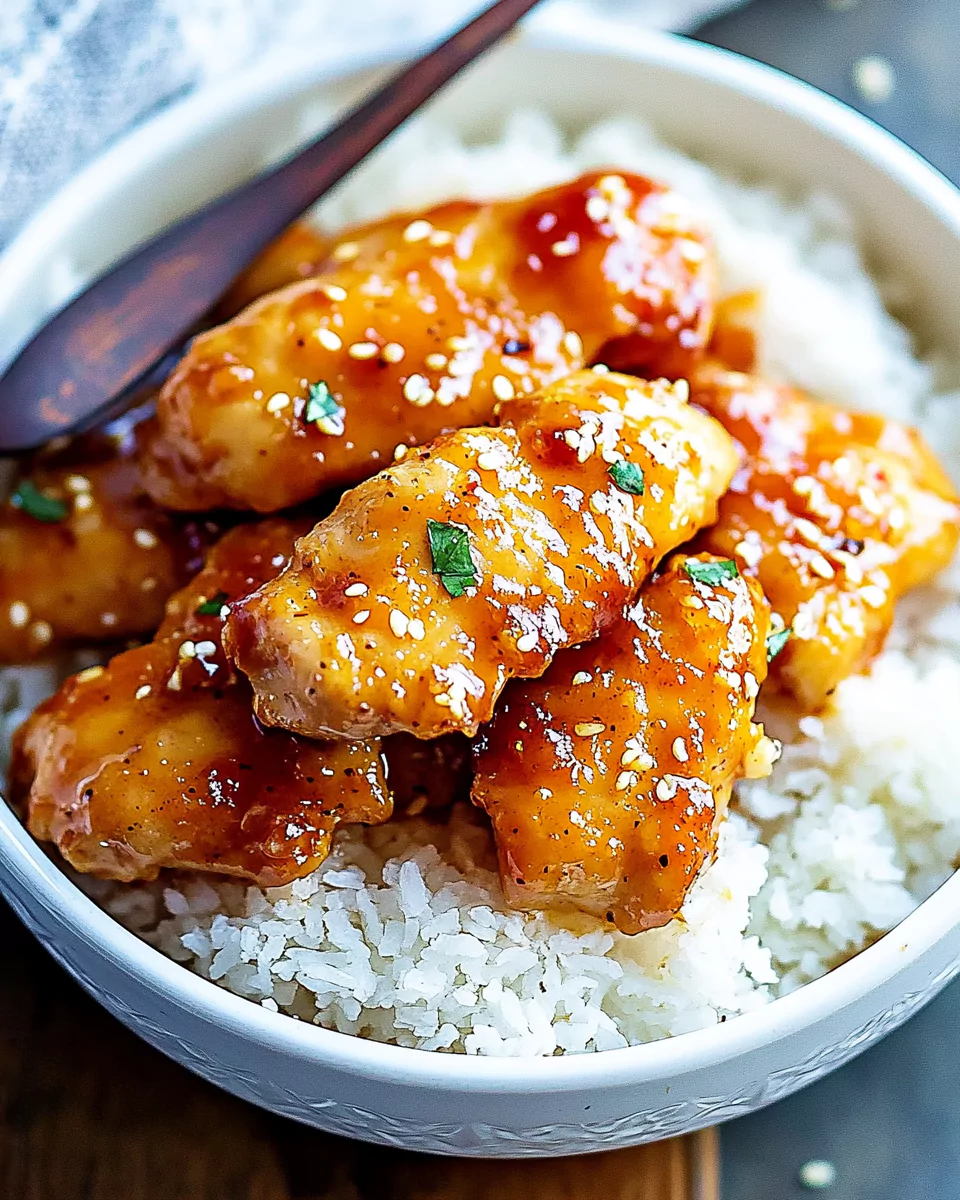
Sticky, tender, and packed with flavor, this honey garlic chicken is an absolute crowd-pleaser! With its perfect balance of sweetness and savory depth, this dish makes a quick, easy, and satisfying weeknight meal.
Grab This Chef Knife Now - Almost Gone!
- Stays Razor-Sharp: Ice-hardened blade keeps its edge longer than ordinary knives
- Superior Grip Control: Unique finger hole design gives you perfect balance and safety
- Built to Last a Lifetime: Premium stainless steel blade with elegant beech wood handle
Customer Reviews ★★★★★
Why You’ll Love This Recipe
- Quick and Easy: Ready in just 20 minutes.
- Incredible Flavor: A blend of honey, garlic, soy sauce, and butter for a luscious glaze.
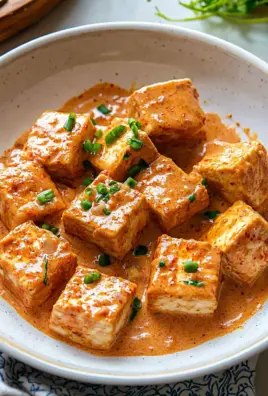
- Versatile: Works with chicken thighs, breasts, or even tofu for a vegetarian twist.
- Customizable: Simple ingredient swaps make it adaptable to various dietary needs.
Preparation Phase
Essential Tools and Equipment
- Large Frying Pan/Skillet: Ensures even cooking and searing of the chicken.
- Small Mixing Bowl: Perfect for whisking together the sauce.
- Tongs: For flipping chicken without breaking the coating.
- Knife and Cutting Board: Essential for mincing garlic and preparing garnishes.
Importance of Each Tool
- A large frying pan prevents overcrowding, ensuring the chicken sears beautifully.
- Tongs make flipping easier and avoid damaging the chicken’s crust.
- A sharp knife ensures garlic is minced finely for an even distribution of flavor.
Preparation Tips
- Pat Chicken Dry: Before coating with cornflour, pat chicken thighs dry to enhance crispiness.
- Preheat the Pan: Heat the oil before adding chicken to achieve a golden sear.
- Monitor Garlic: Garlic can burn quickly; reduce heat before adding it to the pan.
Ingredients
For the Chicken:
- 8 chicken thighs (skinless and boneless)
- 2 tbsp cornflour (cornstarch)
- ½ tsp salt
- ½ tsp pepper
- 2 tbsp vegetable oil
- 1 tbsp unsalted butter
- 4 cloves garlic, minced
For the Sauce:
- 110 g (1/3 cup) honey
- 80 ml (1/3 cup) chicken stock
- 1 tbsp rice vinegar
- 1 tbsp light soy sauce
To Serve:
- 1 tbsp fresh parsley, finely chopped
- ½ tsp chili flakes
- Boiled rice
Step-by-Step Directions
1. Prepare the Chicken
- Place the chicken thighs in a medium bowl.
- Add cornflour, salt, and pepper. Toss to coat the chicken evenly.
2. Cook the Chicken
- Heat vegetable oil in a large frying pan or skillet over high heat.
- Arrange the chicken thighs in the pan in a single layer.
- Cook for 4-5 minutes on one side until golden brown.
- Flip the chicken and cook for another 2 minutes.
3. Add Garlic and Butter
- Reduce the heat to medium.
- Add butter to the pan and let it melt.
- Stir in minced garlic and sauté until fragrant (about 30 seconds).
4. Make the Sauce
- In a small bowl, whisk together honey, chicken stock, rice vinegar, and soy sauce.
- Stir until fully combined.
5. Simmer and Thicken
- Pour the sauce over the chicken in the pan.
- Turn up the heat to bring the sauce to a boil.
- Reduce to a simmer and cook for 4-5 minutes, stirring occasionally. The sauce will thicken and coat the chicken.
6. Serve
- Garnish the chicken with freshly chopped parsley and chili flakes.
- Serve hot over boiled rice, ensuring each portion gets a generous coating of sauce.
Notes
- Chicken Breasts Option: Use chicken breasts sliced into thick strips or pounded for even cooking.
- Make It Gluten-Free: Substitute soy sauce with tamari and ensure the rice vinegar and chicken stock are gluten-free.
- Ingredient Swaps:
- Replace rice vinegar with apple cider vinegar or white wine vinegar plus a pinch of sugar.
- Use dark soy sauce for a deeper color if light soy sauce isn’t available.
- Substitute vegetable oil with sunflower, rapeseed, or ghee for cooking.
Serving Suggestions
Best Pairings
- Boiled Rice: A classic choice to soak up the delicious sauce.
- Steamed Vegetables: Add color and nutrition with broccoli, bok choy, or green beans.
- Noodles: Toss egg noodles or rice noodles in sesame oil for an authentic twist.
- Fresh Salad: A light cucumber and sesame salad balances the richness of the chicken.
Common Mistakes to Avoid
- Overcooking the Chicken
- Ensure the chicken is cooked just until no longer pink inside to keep it tender and juicy.
- Burning the Garlic
- Add garlic only after lowering the heat to medium. Burnt garlic can impart bitterness to the dish.
- Sauce Not Thickening
- Let the sauce simmer on medium heat. For extra thickness, add a cornstarch slurry (1 tsp cornstarch mixed with 2 tsp water).
- Crowding the Pan
- Cook chicken in batches if necessary to ensure an even sear.
Side Dish Recommendations
1. Garlic Green Beans
Quickly stir-fry green beans with minced garlic, sesame oil, and a dash of soy sauce for a simple yet flavorful side.
2. Sesame Ginger Noodles
Cook noodles and toss them in a mix of sesame oil, grated ginger, soy sauce, and a touch of honey for a cohesive pairing.
3. Asian Slaw
Shred cabbage, carrots, and radishes. Dress with rice vinegar, sesame oil, and a sprinkle of sesame seeds for a crunchy, tangy complement.
4. Fried Rice
Use day-old rice and fry with scrambled eggs, peas, carrots, and soy sauce for an irresistible addition to your chicken.
5. Miso Soup
Serve a light miso soup with tofu cubes, scallions, and seaweed to bring a comforting, warm element to the meal.
6. Cucumber Sesame Salad
Thinly slice cucumbers and toss with sesame oil, rice vinegar, soy sauce, and a pinch of sugar. Top with sesame seeds for crunch.
7. Roasted Vegetables
Oven-roast zucchini, red peppers, and carrots with olive oil and salt. The caramelized edges complement the sweetness of the chicken.
8. Egg Rolls
Serve crispy vegetable or chicken egg rolls with a tangy dipping sauce for an indulgent side.
Recipe Tips for Perfection
- Balance the Sweetness: Adjust the honey to your taste. Add a squeeze of lemon if the dish feels overly sweet.
- Make it Spicy: Sprinkle chili flakes or add a splash of Sriracha to the sauce for a spicy kick.
- Alternative Proteins: Swap chicken thighs for chicken breasts, pork chops, tofu, or even shrimp. Adjust cooking times accordingly.
- Enhance Umami Flavor: Add a teaspoon of oyster sauce or fish sauce to the sauce for deeper savory notes.
Storage and Reheating Instructions
Storing Leftovers
- Place cooled chicken and sauce in an airtight container.
- Store in the refrigerator for up to 3 days.
- For longer storage, freeze in a freezer-safe container for up to 3 months.
Reheating
- Oven: Preheat oven to 180°C/350°F. Place chicken in a baking dish, cover with foil, and heat for 12-15 minutes.
- Microwave: Heat in a microwave-safe dish on medium power for 2-3 minutes, stirring halfway through.
- Stovetop: Reheat in a skillet over low heat, adding a splash of chicken stock if needed to loosen the sauce.
Freezing Tips
- Freeze the chicken and sauce separately for better texture.
- Thaw overnight in the refrigerator before reheating.
FAQs
1. Can I use chicken breasts instead of thighs?
Yes! Slice them into thick strips or pound them evenly for quicker and more uniform cooking.
2. How do I thicken the sauce if it’s too runny?
If the sauce doesn’t thicken, mix 1 teaspoon of cornstarch with 2 teaspoons of cold water and stir it into the sauce while simmering.
3. Can I make this dish vegetarian?
Absolutely! Substitute chicken with firm tofu or roasted cauliflower. Use vegetable stock instead of chicken stock.
4. What’s the best way to make this dish gluten-free?
Use gluten-free tamari in place of soy sauce and check that your chicken stock and rice vinegar are gluten-free.
5. Can I double this recipe for meal prep?
Yes! Simply double all the ingredients and use a larger pan to avoid overcrowding. Divide into individual portions for easy reheating.
6. What can I use instead of rice vinegar?
You can substitute rice vinegar with apple cider vinegar, white vinegar, or white wine vinegar. Add ¼ teaspoon of sugar for similar sweetness.
7. Why did my garlic burn?
Garlic burns quickly at high heat. Always lower the heat before adding it and stir it gently to prevent scorching.
Conclusion
This honey garlic chicken is a versatile, flavorful dish that will wow your family and guests. Whether served over rice, paired with noodles, or complemented with vibrant sides, it’s an irresistible addition to your meal rotation. With easy-to-follow steps and helpful tips, you’ll have a perfectly cooked dish every time!
Honey Garlic Chicken
Ingredients
For the Chicken:
- 8 chicken thighs skinless and boneless
- 2 tbsp cornflour cornstarch
- ½ tsp salt
- ½ tsp pepper
- 2 tbsp vegetable oil
- 1 tbsp unsalted butter
- 4 cloves garlic minced
For the Sauce:
- 110 g 1/3 cup honey
- 80 ml 1/3 cup chicken stock
- 1 tbsp rice vinegar
- 1 tbsp light soy sauce
To Serve:
- 1 tbsp fresh parsley finely chopped
- ½ tsp chili flakes
- Boiled rice
Instructions
Prepare the Chicken:
- Place the chicken thighs in a bowl and toss them with cornflour, salt, and pepper until fully coated.
Cook the Chicken:
- Add the chicken thighs and cook for 4-5 minutes on one side until golden brown. Flip the chicken and cook for another 2 minutes.
Add Garlic and Butter:
- Add the butter to the pan and let it melt. Stir in the minced garlic and reduce the heat to medium to avoid burning the garlic.
Make the Sauce:
- In a small bowl, mix the honey, chicken stock, rice vinegar, and soy sauce. Stir until combined.
- Pour the sauce into the pan with the chicken.
Simmer and Thicken:
- Turn up the heat and bring the sauce to a boil. Reduce to a simmer and cook for 4-5 minutes, allowing the sauce to thicken and coat the chicken. Ensure the chicken is cooked through and no longer pink in the middle.
Serve:
- Garnish the chicken with fresh parsley and chili flakes. Serve hot over boiled rice.
Notes
Make It Gluten-Free: Swap soy sauce for tamari and use gluten-free chicken stock. Ensure your rice vinegar is gluten-free.
Freezing Instructions: Cook the dish, let it cool quickly, then freeze in an airtight container. Defrost overnight and reheat in a 180°C/350°F oven for 12-15 minutes, covered with foil.
Leftovers and Reheating: Store leftovers in the refrigerator and reheat in the oven as above. The chicken won’t be as tender when reheated but will still taste delicious.
Ingredient Swaps:
Replace rice vinegar with apple cider vinegar or white wine vinegar plus ¼ tsp sugar.
Use ¾ tbsp dark soy sauce if you don’t have light soy sauce.
Substitute vegetable oil with a neutral high-heat oil like sunflower, rapeseed, or ghee.


Leave a Comment