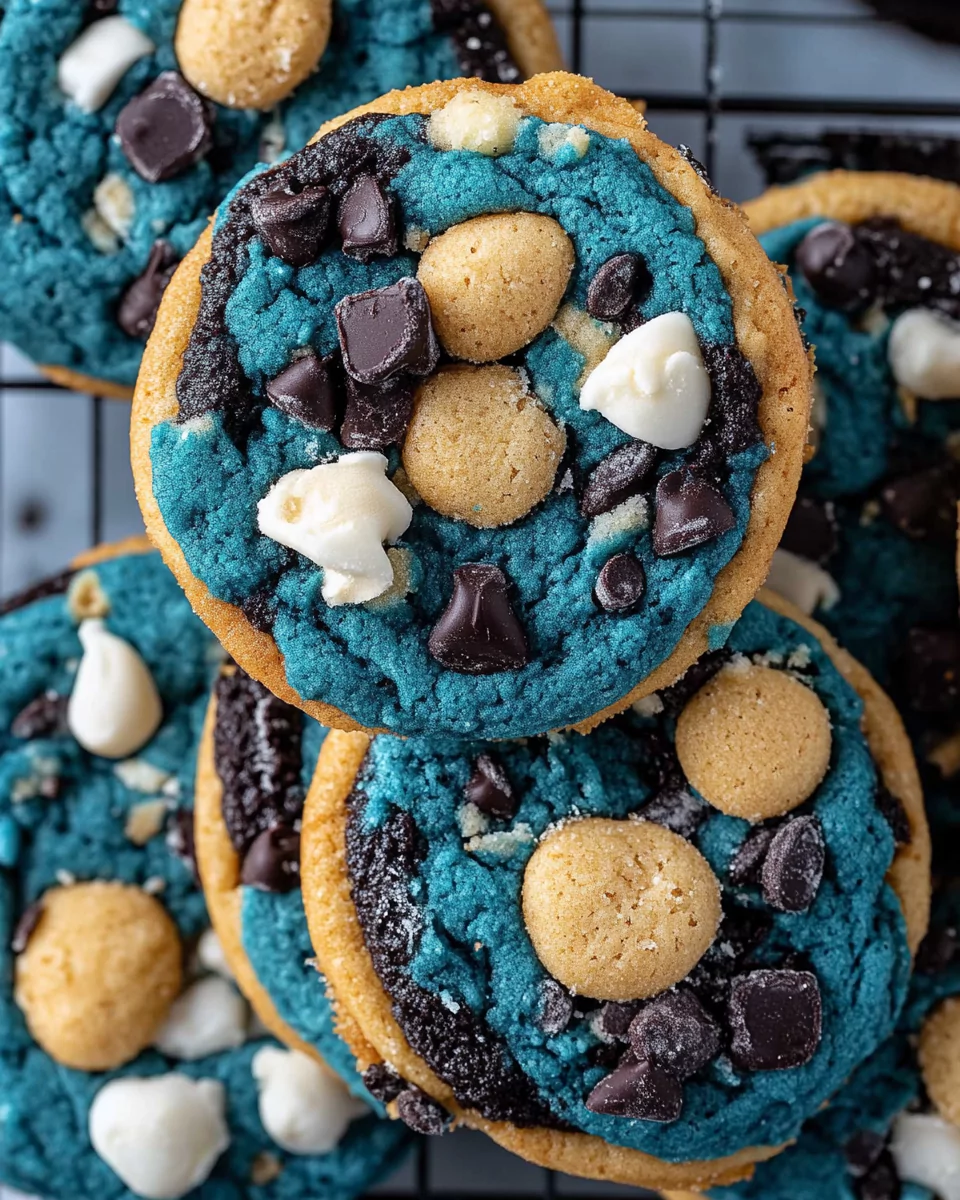
These Cookie Monster Cookies are as fun to eat as they are to look at! Their vibrant blue color, soft and chewy texture, and a mix of white chocolate chips, Oreo chunks, and Chips Ahoy pieces make them a true showstopper. Perfect for kids’ parties, themed events, or simply a whimsical dessert craving, these cookies will have everyone reaching for more.
Grab This Chef Knife Now - Almost Gone!
- Stays Razor-Sharp: Ice-hardened blade keeps its edge longer than ordinary knives
- Superior Grip Control: Unique finger hole design gives you perfect balance and safety
- Built to Last a Lifetime: Premium stainless steel blade with elegant beech wood handle
Customer Reviews ★★★★★
In this detailed guide, you’ll find everything you need to make these cookies a hit, from preparation tips to step-by-step instructions. Plus, learn how to customize them for any occasion.
Preparation Phase & Tools to Use
Essential Tools and Equipment
Gathering the right tools ensures a smooth baking experience:
- Mixing bowls: One medium-sized for dry ingredients, one large for wet ingredients.
- Electric mixer: A hand or stand mixer is essential for creaming butter and sugar.
- Cookie scoop: A 2-tablespoon scoop helps achieve uniform cookie sizes.
- Silicone baking mats: Prevent sticking and ensure even baking.
- Spatula: For gently folding in mix-ins without overmixing.
Ingredients List
Dry Ingredients
- 3 cups all-purpose flour (360 grams)
- 2 tsp cornstarch
- 1 tsp baking soda
- ¼ tsp salt
Wet Ingredients
- 2 sticks unsalted butter, room temperature (1 cup)
- 1 ¼ cups brown sugar
- ¼ cup granulated sugar
- 2 large eggs, room temperature
- 1 tsp vanilla extract
Food Coloring
- Royal blue gel food coloring
- Electric blue gel food coloring
- Violet gel food coloring
Mix-ins
- ⅔ cup white chocolate chips, divided
- ⅔ cup chopped Chips Ahoy cookies (mini or regular)
- ⅔ cup chopped Oreos
Preparation Tips
- Soften butter in advance: Leave butter at room temperature for 30 minutes before starting. This ensures smooth creaming with sugar.
- Accurate measurements: Use a kitchen scale for precise flour measurement to avoid dense cookies.
- Mix gently: Overmixing the dough can result in tough cookies. Stop mixing as soon as the ingredients are incorporated.
- Food coloring: Start with a little and build up to your desired blue hue. Gel food coloring works best for vibrant, non-watery results.
Step-by-Step Directions
Step 1: Preheat and Prepare
- Preheat the oven to 350°F (175°C).
- Line a baking sheet with a silicone baking mat or parchment paper.
Step 2: Combine Dry Ingredients
- In a medium mixing bowl, whisk together the flour, cornstarch, baking soda, and salt. Set aside.
Step 3: Cream Butter and Sugar
- In a large mixing bowl, use an electric mixer to beat the butter, brown sugar, and granulated sugar on medium speed for 2 minutes, until the mixture is light and fluffy.
Step 4: Add Eggs and Vanilla
- Add the eggs and vanilla extract to the butter mixture. Beat for 30 seconds, or until combined.
Step 5: Incorporate Dry Ingredients
- Gradually add the dry ingredients to the wet mixture. Mix on low speed until a dough starts to form.
Step 6: Add Food Coloring
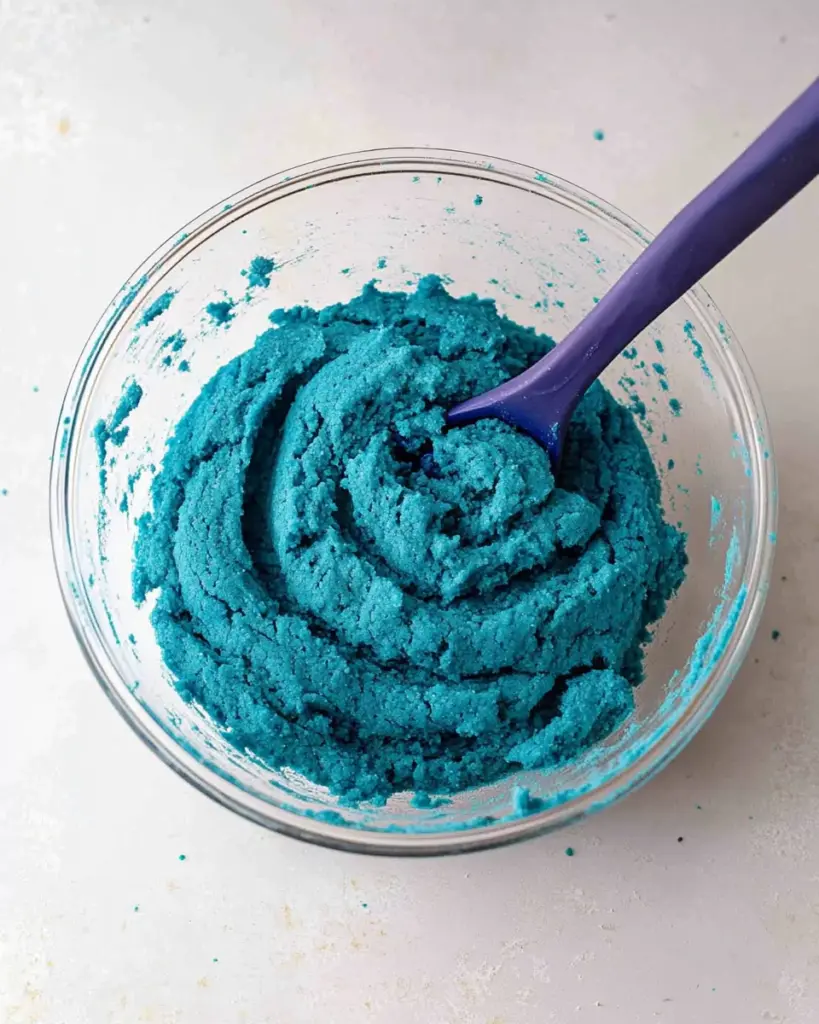
- Before fully combining the dough, add the royal blue, electric blue, and violet gel food coloring. Mix until the dough reaches a rich, vibrant blue color.
Step 7: Fold in Mix-ins
- Gently fold in ⅓ cup white chocolate chips, ⅓ cup chopped Chips Ahoy, and ⅓ cup chopped Oreos using a spatula. Save the remaining mix-ins for later.
Step 8: Form Cookie Dough Balls
- Use a 2-tablespoon cookie scoop to form evenly sized dough balls. Roll them between your hands to smooth, then press the remaining mix-ins onto the outside of each ball for a visually appealing finish.
Step 9: Bake
- Place up to 8 cookies on the prepared baking sheet, spacing them about 2 inches apart.
- Bake for 10-12 minutes, pulling them out of the oven just before the edges brown to ensure soft, chewy centers.
Step 10: Cool
- Let the cookies cool on the baking sheet for 15 minutes before transferring them to a wire rack to cool completely.
Tips for Success
- Single tray baking: Bake one cookie sheet at a time to ensure even heat distribution.
- Avoid overbaking: The cookies will continue to set as they cool, so remove them while the centers look slightly underdone.
Now your Cookie Monster Cookies are ready to serve and enjoy! Head over to Part 2 for creative serving ideas and troubleshooting tips.
Serving Suggestions and Recipe Perfection
Your Cookie Monster Cookies are baked and cooling—now it’s time to make them shine at the table. From serving suggestions to common mistakes and their fixes, this section ensures your cookies are not just delicious but presented and perfected like a pro.
Serving Suggestions
Make your cookies the centerpiece of any dessert spread with these creative serving ideas:
- Classic Pairing: Serve warm cookies with a tall glass of milk—perfect for dunking.
- Ice Cream Sandwiches: Use two cookies to sandwich a scoop of vanilla or cookies-and-cream ice cream.
- Themed Dessert Plate: Arrange with mini cookie cutters and blue candies for a Cookie Monster party vibe.
- Drizzle Love: Drizzle melted white chocolate or a blue candy melt glaze over the cookies.
- Kid-Friendly Snack Packs: Wrap individual cookies in clear cellophane bags with a fun ribbon for party favors.
- Dessert Tower: Stack cookies on a tiered dessert stand with blue-themed decor for a showstopping centerpiece.
Common Mistakes and How to Avoid Them
1. Overbaking
- Problem: The cookies turn out dry or hard.
- Solution: Bake until the edges are set, but the centers look slightly underdone. Remember, cookies continue to bake as they cool on the sheet.
2. Dull Colors
- Problem: The blue dough isn’t vibrant after baking.
- Solution: Use gel-based food coloring, which holds its intensity even after baking. Add enough for a bold color, as the blue will lighten slightly during the baking process.
3. Spreading Too Much
- Problem: Cookies spread too thin in the oven.
- Solution: Ensure your butter is at room temperature, not melted. Chilling the dough for 15-20 minutes before baking can also help maintain the cookie shape.
4. Uneven Baking
- Problem: Some cookies are underbaked, while others are overdone.
- Solution: Bake only one sheet at a time on the middle rack and rotate the sheet halfway through baking for even heat distribution.
Perfect Side Dish Recommendations
These Cookie Monster Cookies pair wonderfully with a variety of sides, drinks, and accompaniments. Here are eight options:
1. Vanilla Milkshake
The creamy, vanilla flavor balances the rich sweetness of the cookies. Add a dollop of whipped cream and a blue straw for fun.
2. Chocolate Dipping Sauce
Melt dark chocolate for a warm dipping sauce that adds a touch of indulgence.
3. Berry Compote
Serve with a side of fresh berry compote for a fruity contrast to the cookie’s sweetness.
4. Vanilla Ice Cream
Classic vanilla ice cream cuts through the richness and provides a refreshing contrast.
5. Fresh Fruit Platter
Add balance to your dessert spread with sliced strawberries, blueberries, and grapes.
6. Caramel Drizzle
Drizzle a light caramel sauce over the cookies for a gourmet touch.
7. Whipped Cream Topping
Top each cookie with a dollop of whipped cream and a sprinkle of blue edible glitter for a party-ready look.
8. Salted Pretzels
The salty crunch of pretzels complements the cookies and adds a satisfying textural contrast.
Tips, Storage, and FAQs for Cookie Monster Cookies
Now that your Cookie Monster Cookies are baked and served, let’s ensure you know how to store them for later enjoyment, reheat them perfectly, and answer common questions. This section also includes helpful tips and a final call to action to encourage readers to share and explore more recipes.
Recipe Tips for Cookie Monster Cookies
How to Perfect Your Cookies
- Chill the Dough: If your dough is too soft, refrigerate for 15-20 minutes before baking. This prevents excessive spreading.
- Custom Mix-ins: Swap white chocolate chips for milk chocolate, add colorful sprinkles, or experiment with peanut butter chips for variety.
- Cookie Size: For jumbo cookies, use a 4-tablespoon scoop and bake for an additional 2-3 minutes.
Enhancing the Blue Color
- Add a touch of black gel food coloring to deepen the blue for a more dramatic effect.
- Test a small batch of dough before baking all cookies to ensure the color looks just right.
Storage and Reheating Instructions
Storing Your Cookies
- At Room Temperature: Place cookies in an airtight container and store at room temperature for up to 5 days. Add a slice of bread to the container to keep cookies soft.
- In the Freezer: Arrange cooled cookies in a single layer on a baking sheet and freeze until solid. Transfer to a freezer-safe bag or container. They’ll stay fresh for up to 3 months.
Reheating Your Cookies
- Microwave: Warm cookies for 8-10 seconds to restore their softness.
- Oven: Preheat to 300°F (150°C) and warm cookies on a baking sheet for 2-3 minutes.
Frequently Asked Questions
Why are my cookies turning out flat?
This often happens when the butter is too warm or the dough hasn’t been chilled. Use room-temperature butter (not melted) and consider chilling the dough before baking.
Can I make these cookies gluten-free?
Yes! Substitute all-purpose flour with a gluten-free 1:1 baking mix. Ensure the mix-ins, such as Oreos, are also gluten-free.
Do I need to use gel food coloring?
Gel food coloring is recommended because it’s more concentrated than liquid food coloring, which can water down the dough and reduce vibrancy.
Can I freeze the dough instead of baked cookies?
Absolutely. Roll the dough into balls, freeze them on a baking sheet, and transfer them to a freezer-safe bag. Bake directly from frozen, adding 1-2 minutes to the bake time.
What makes these cookies chewy?
The combination of brown sugar, cornstarch, and slightly underbaking the cookies ensures a soft and chewy texture.
Conclusion
These Cookie Monster Cookies are a whimsical, vibrant treat that will delight kids and adults alike. With their bold blue hue and irresistible mix-ins, they’re perfect for parties, bake sales, or even a fun baking project with family.
Thank you for joining us on this baking journey. Happy baking, and enjoy your Cookie Monster Cookies!

Leave a Comment